
As-salamu alaykum 🇵🇸
Have you ever found yourself lacking some space around you? You’d love to buy that beautiful piece of furniture for your house, but then you think:
“Oh dude, how can it fit? I don’t have enough space!”
Well, in a similar fashion, that’s exactly what my OpenMediaVault (OMV) experienced the other day. Sure, it wasn’t about furniture—but it was me trying to squeeze yet another container into it via the Containers service.
Initially, I’d created the VM with just enough room for the OS—about 4GB—which turned out to be laughably insufficient for my Calibre stack. At first, I assumed it was some permission shenanigans, but Portainer was pretty eloquent about the error:
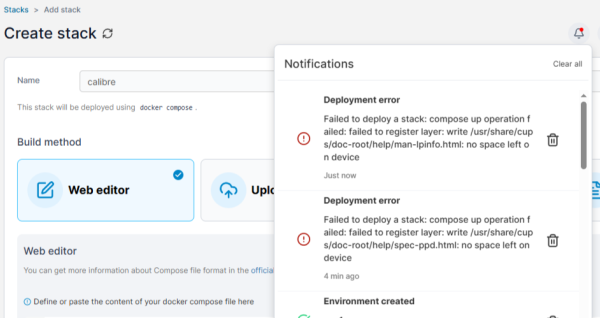
Naturally, I double-checked and…
I thought this would be a quick two-click fix—well, no. Not terribly complicated, but if you find yourself in the same predicament, be prepared to set aside 15 minutes of quality nerd time.
The First Attempt
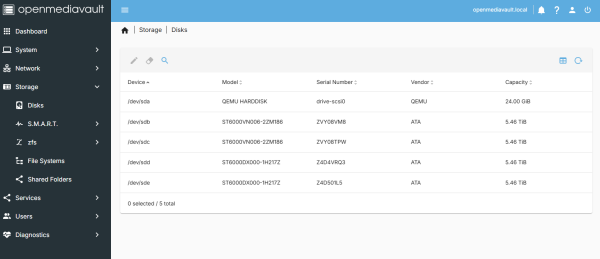
My first move: hopping into the Proxmox UI to allocate more space to the disk. I gleefully restarted the VM, convinced that some kind of SciFi auto-expanding root partition magic would happen.
Spoiler: it did not.
After booting up, the disks page at least showed that the bigger disk was loaded:
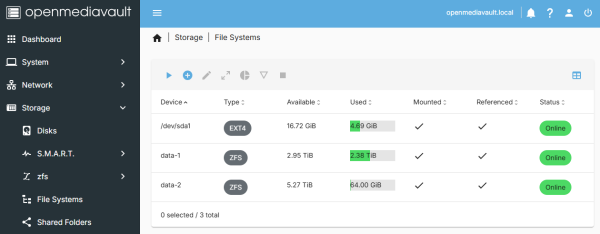
But the main partition hadn’t budged a single byte:
The Solution
I had to rummage around the net, piecing together a Frankenstein guide to expand the partition properly. Since it turned out to be pretty straightforward, I’m sharing it here to save you the scavenger hunt.
You’re welcome. 😉
If you’re determined to go full command-line ninja, this guide isn’t for you. I’m using GParted Live, because life’s too short to type endless commands when you don’t have to.
Prerequisites
Before you get started, you’ll need:
- A working OMV installation (I’m on OMV 7)
- Some unallocated space on your virtual disk
- The
omv-extrasplugin installed (it adds extra goodness) - The
openmediavault-kernelplugin installed (this is what lets you boot GParted Live)
To install the kernel plugin:
- Go to System > Plugins
- Search for
kernel - Install it
- Reboot
Booting into GParted Live
Once you’re ready, head to:
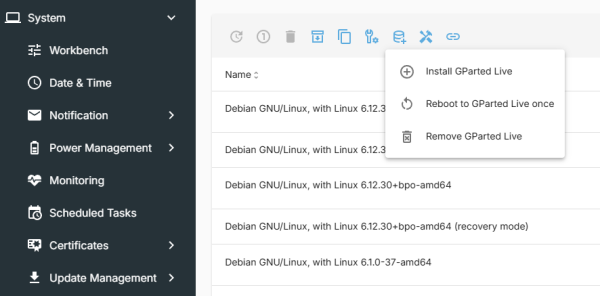
System > Kernel
Install GParted Live, and then hit Reboot to GParted Live.
Follow the boot process via your Proxmox console, or if you’re on bare metal, just connect a monitor and your favorite keyboard. After a couple of moments, you’ll see the GParted UI.
Resizing the Partition
Here’s what I saw:
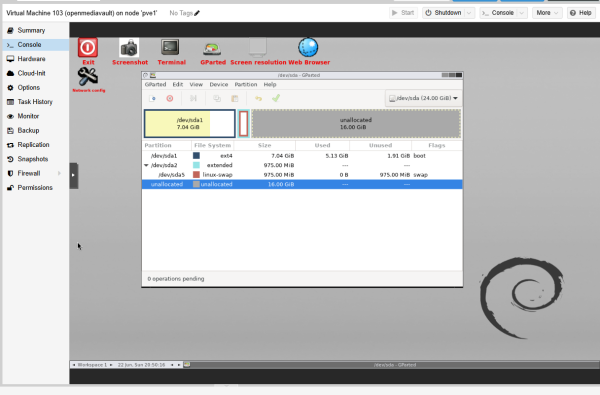
All looked fine…except for that pesky swap partition, sitting smugly in my way. Sure, I could’ve just created a shiny new 16GB partition, but no—that wasn’t what I wanted. I wanted my existing root partition expanded.
So, the plan was:
- Remove the
swappartition. - Expand the
ext4partition, making sure to leave 975MB unallocated so I could recreate the swap later.
Once done, commit your changes and reboot into OMV.
All Done
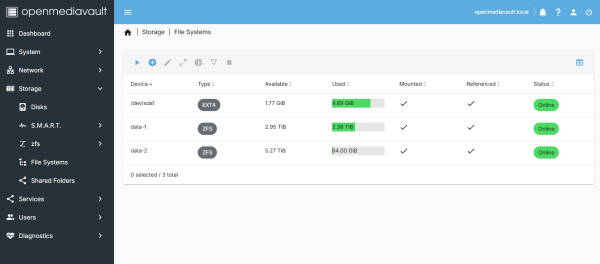
That’s it. If you now head to Storage > File Systems, you’ll see your available space has grown nicely:
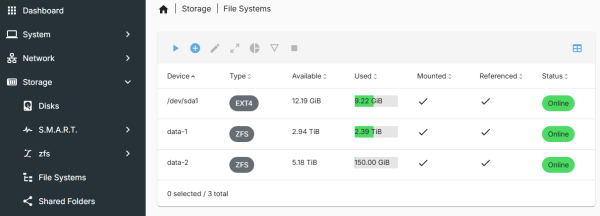
(This screenshot was taken a few days later, so that’s why you see 9.22GB used—no mysterious partition curse. 😅)
Wrapping Up
I hope this helped you avoid a mini meltdown when your containers outgrow your disk. Let me know how it went for you, and…
Happy building ⚒